Difference between revisions of "NFT Minting/Input"
| (8 intermediate revisions by the same user not shown) | |||
| Line 1: | Line 1: | ||
{{:NFT Minting/Logic Model Explorer}} | |||
=Summary Step for Input Process= | =Summary Step for Input Process= | ||
<onlyinclude> | <onlyinclude> | ||
| Line 7: | Line 8: | ||
* Digital Asset, which are files and/or PKC's page URL | * Digital Asset, which are files and/or PKC's page URL | ||
</onlyinclude> | </onlyinclude> | ||
=What is Cryptocurrency Wallet?= | |||
A cryptocurrency wallet is an application that functions as a wallet for your cryptocurrency. It is called a wallet because it is used similarly to a wallet you put cash and cards in. Instead of holding these physical items, it stores the passkeys you use to sign for your cryptocurrency transactions and provides the interface that lets you access your crypto. | |||
=How to install | Modern cryptocurrency wallets make the blockchain accessible to everyone. When cryptocurrency was first introduced, sending cryptocurrency was a manual task that required entering long keys. Today, the software does most of it for you. | ||
=How to install Cryptocurrency Wallet= | |||
{{:How to install Cryptocurrency Wallet}} | |||
=Preparing your digital asset= | =Preparing your digital asset= | ||
== | To enable efficient NFT storage, your files or your digital asset should be stored off-chain. That is mean that you will not store inside the block-chain, but you only store the link to the file. This link should also be link to some kind of decentralized storage. There are several options on storing the file into decentralized storage. | ||
==InterPlanetary File System (IPFS)== | |||
The InterPlanetary File System (IPFS) is a protocol, hypermedia and file sharing peer-to-peer network for storing and sharing data in a distributed file system. IPFS uses content-addressing to uniquely identify each file in a global namespace connecting IPFS hosts. | |||
To enable access to the file you upload, you will need some kind of gateway between IPFS Universe and HTTP/S Universe. At this momen, service such as [https://pinata.cloud pinata.com] is offering free service with some limitation. The limitations for free service are | |||
* 100 Maximum pinned file | |||
* 1GB Maximum Storage | |||
* No dedicated gateways | |||
* 10.000 Maximum request | |||
To upload your file, please navigate to [https://pinata.cloud Pinata Platform], create your account and upload your file. You will receive one CID (Content Identifier) for each file that you upload. Each of the CID can be constructed into static URL to access the files. Below is the example of how the file will look like after uploading into IPFS. | |||
[[File:Pinata-02.png|500px|thumb|center]] | |||
To retrieve you static URL using share gateway, please click on the filename, the leftmost column, which will redirect you to the static URL. Then you can save the URL and use it on your NFT field. | |||
==[https://nft.storage/ NFT.Storage]== | |||
The other way to store you file, is on NFT.Storage. Qouting from [https://nft.storage/ NFT.Storage], | |||
NFT.Storage is a long-term storage service designed for off-chain NFT data (like metadata, images, and other assets) for up to 31GiB in size per individual upload. | |||
Data is content addressed using IPFS, meaning the URI pointing to a piece of data (“ipfs://…”) is completely unique to that data (using a content identifier, or CID). IPFS URLs and CIDs can be used in NFTs and metadata to ensure the NFT forever actually refers to the intended data (eliminating things like rug pulls, and making it trustlessly verifiable what content an NFT is associated with). | |||
NFT.Storage stores many copies of uploaded data on the public IPFS network in two primary ways: in dedicated IPFS servers managed by NFT.Storage, and decentralized on Filecoin. Since IPFS is a standard used by many different storage services, it's easy to redundantly store data uploaded to NFT.Storage on any other IPFS-compatible storage solution from pinning services, to your local IPFS node, to other storage networks like Arweave or Storj. And as time goes on, NFT.Storage will increasingly decentralize itself as a public good! | |||
To store your file at NFT.Storage, please navigate to [https://nft.storage nft.storage] and create your account. You can also use [github.com github] account to register. Once registration is finished, you can start uploading your file using '''Files''' menu-item on Navigation Bar on the top of the screen. | |||
Click '''Upload''' button and follow the on-screen instruction to upload your file. Below are the screen capture of the result after file is uploaded. | |||
[[File:Nft-storage-01.png|500px|thumb|center|NFT Storage Result]] | |||
Click on '''Action''' button, and click '''View URL''' to see the static URL result of your file, it will looks something like below link | |||
https://bafkreibdetzdqqfgns4qqqfrdqfugur3mbazan23h7ndixkjseoaqzvpeq.ipfs.nftstorage.link/ | |||
NFT Storage will use share gateway without any limitation, however, there no guarantee that the gateway will always be available during the request. | |||
Latest revision as of 08:20, 9 November 2022
| This page is part of logic model: NFT Minting | ||||
|---|---|---|---|---|
| Context | NFT Minting/Context | Inputs | Process | Output |
| Goal | NFT Minting/Goal | NFT Minting/Input | NFT Minting/Process | NFT Minting/Output |
| Success Criteria | NFT Minting/Criteria | |||
| Boundary/Safety Conditions | NFT Minting/Boundary | |||
Summary Step for Input Process
- Metamask or similar wallet provider installed on your browser, containing below items
- Public and Private Key for Goerli Test-net Network
- Public and Private Key for Solana Network
- Public and Private Key for Polygon Network
- Digital Asset, which are files and/or PKC's page URL
What is Cryptocurrency Wallet?
A cryptocurrency wallet is an application that functions as a wallet for your cryptocurrency. It is called a wallet because it is used similarly to a wallet you put cash and cards in. Instead of holding these physical items, it stores the passkeys you use to sign for your cryptocurrency transactions and provides the interface that lets you access your crypto.
Modern cryptocurrency wallets make the blockchain accessible to everyone. When cryptocurrency was first introduced, sending cryptocurrency was a manual task that required entering long keys. Today, the software does most of it for you.
How to install Cryptocurrency Wallet
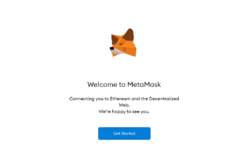
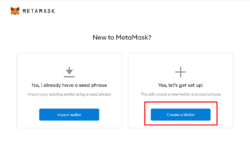
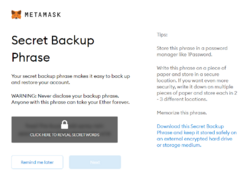
There are several Crypto Wallet software that is very popular on the internet currently. In this tutorial we are going to install two different Crypto Currency Wallet, which describe below
| No | Name |
|---|---|
| 1 | Metamask |
| |
| 2 | Phantom |
| |
Create your marketplace account
This is the part that you need to link your Wallet account with your NFT Market Place account. The market place account can be created when you link your wallet account. Please follow below instruction to have your market place account ready to mint NFT.
OpenSea.io
Opensea is one of the most common NFT market place that is available on the internet, we will proceed to mint our digital asset on this platform. Please click OpenSea URL to proceed.
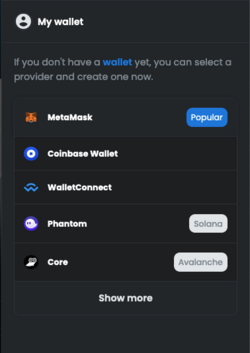
Once you open the platform, please click on upper right-hand corner to connect your wallet with platform. For this particular platform you will use Metamask on Polygon network.
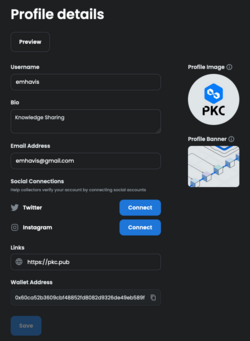
Please click on Metamask icon and connect your wallet, at this position, your browser will bring your Metamask window, please login using your password to open Metamask. Once the connection is done you can see you profile is created on Opensea. For the first time before we mint our NFT, please complete your profile data by clicking on profile button next to the left of Wallet icon, then click on Settings.
Once you completed the profile, you are ready to mint your first NFT, please continue to the NFT Minting/Process stage of the Logic Model.
Solsea.io
Solsea is NFT marketplace for Solana NFT network. We are going to mint our NFT on this particular platform on. Please open Solsea.io and connect your wallet by clicking on top-right-hand button of Wallet. For this platform we are going to use Phantom wallet.
And choose Phantom wallet, if you already have it installed, then the detected flag will be displayed.
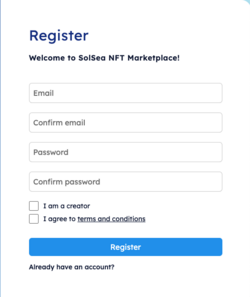
Once you sucessfully connected your wallet, please proceed by clicking on Register button to create your account. This is the difference between OpenSea and Solsea. Opensea will only enable you to use one wallet account on one Opensea account. While on Solsea you can use same wallet for several Solsea Account.
Please follow the registration procedure and Solsea will send you email confirmation to activate your account, so please ensure that you are able to access your provided email address.
Once you finished your account registration, the you are ready to proceed to mint your first NFT, please click following link as the process step of logic model
Preparing your digital asset
To enable efficient NFT storage, your files or your digital asset should be stored off-chain. That is mean that you will not store inside the block-chain, but you only store the link to the file. This link should also be link to some kind of decentralized storage. There are several options on storing the file into decentralized storage.
InterPlanetary File System (IPFS)
The InterPlanetary File System (IPFS) is a protocol, hypermedia and file sharing peer-to-peer network for storing and sharing data in a distributed file system. IPFS uses content-addressing to uniquely identify each file in a global namespace connecting IPFS hosts.
To enable access to the file you upload, you will need some kind of gateway between IPFS Universe and HTTP/S Universe. At this momen, service such as pinata.com is offering free service with some limitation. The limitations for free service are
- 100 Maximum pinned file
- 1GB Maximum Storage
- No dedicated gateways
- 10.000 Maximum request
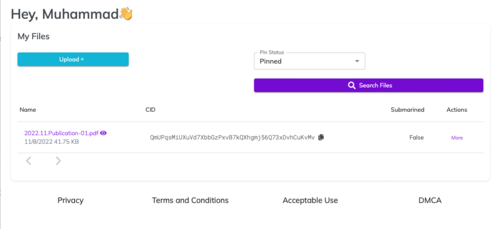
To upload your file, please navigate to Pinata Platform, create your account and upload your file. You will receive one CID (Content Identifier) for each file that you upload. Each of the CID can be constructed into static URL to access the files. Below is the example of how the file will look like after uploading into IPFS.
To retrieve you static URL using share gateway, please click on the filename, the leftmost column, which will redirect you to the static URL. Then you can save the URL and use it on your NFT field.
NFT.Storage
The other way to store you file, is on NFT.Storage. Qouting from NFT.Storage,
NFT.Storage is a long-term storage service designed for off-chain NFT data (like metadata, images, and other assets) for up to 31GiB in size per individual upload.

Data is content addressed using IPFS, meaning the URI pointing to a piece of data (“ipfs://…”) is completely unique to that data (using a content identifier, or CID). IPFS URLs and CIDs can be used in NFTs and metadata to ensure the NFT forever actually refers to the intended data (eliminating things like rug pulls, and making it trustlessly verifiable what content an NFT is associated with).
NFT.Storage stores many copies of uploaded data on the public IPFS network in two primary ways: in dedicated IPFS servers managed by NFT.Storage, and decentralized on Filecoin. Since IPFS is a standard used by many different storage services, it's easy to redundantly store data uploaded to NFT.Storage on any other IPFS-compatible storage solution from pinning services, to your local IPFS node, to other storage networks like Arweave or Storj. And as time goes on, NFT.Storage will increasingly decentralize itself as a public good!
To store your file at NFT.Storage, please navigate to nft.storage and create your account. You can also use [github.com github] account to register. Once registration is finished, you can start uploading your file using Files menu-item on Navigation Bar on the top of the screen.
Click Upload button and follow the on-screen instruction to upload your file. Below are the screen capture of the result after file is uploaded.
Click on Action button, and click View URL to see the static URL result of your file, it will looks something like below link
https://bafkreibdetzdqqfgns4qqqfrdqfugur3mbazan23h7ndixkjseoaqzvpeq.ipfs.nftstorage.link/
NFT Storage will use share gateway without any limitation, however, there no guarantee that the gateway will always be available during the request.
