Enable Moodle Authentication using Keycloak
Introduction
This procedure is tested on Moodle 3.11.6 (Build: 20220314), which you can see on : Site Administration > Notification. The goals is to enable new login button on login screen to login using Keycloak
Steps
Preparation on Keycloak
You need to prepare the client-id on keycloak configuration for Moodle to use, please see How to configure for new client application on Keycloak. Below are the configuration data that you need to prepare.
- ClientID; this can be new client-id or your existing client-id, it depends on how you manage the scope of authorization
- Client Secret; Generated on each client-id
Moodle Configuration
To perform below task, please use administation account.
- Go to Site Administration > Server > OAuth2 Service
- On Create New Service, click on Custom Button
- Below are the field to be completed
| Field Name | Description |
|---|---|
| Name | Input with login name, which will be displayed on front page |
| Client ID | Input with client-id provided by Keycloak |
| Client Secret | Input with client-id's secret, provided by Keycloak |
| Service Base URL | URL of Keycloak service base, which included the Realm's name, e.g https://kck.pkc-back.org/auth/realms/pkc-realm |
| Logo URL | URL of Logo, we are going to use PKC's Logo. |
| This service will be used | Droplist Options, please check on Login Page and Internal Service |
| Scopes included in a login request. | Do not change, use default value |
| Scopes included in a login request for offline access. |
Do not change, use default value |
| Additional parameters included in a login request. |
Keep Blank |
| Additional parameters included in a login request for offline access. |
Keep Blank |
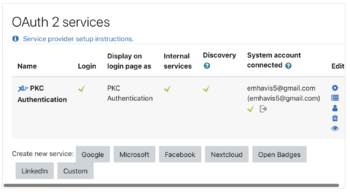
Below are the result, once above's forms is submitted. Please ensure the login is checked and discovery is checked. If it isn't checked, please double check all the value inputted.
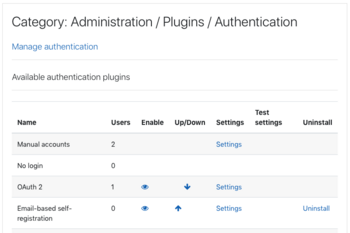
Next step, is to enable the Keycloak login on front page, by escalating the Oauth Login. Please go to Dashboard > Site administration > Plugins > Authentication. And click the Up Arrow' and Eye Icon to enable make the OAuth2 as second choice. Below are the capture of the result.
Result
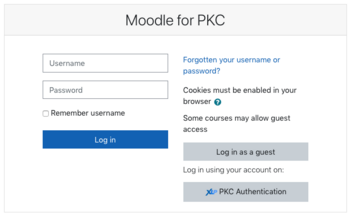
If all the configuration is work correctly, the login page will displayed below screen.


